


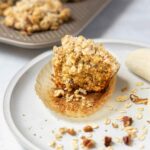


A fun take on the classic Neapolitan ice cream! 3 flavors - chocolate, strawberry and vanilla - laid out in one sugar cookie!
When I first began The Dessert Pantry on Instagram in 2015 I was only familiar with baking a handful of cookie recipes. I never dreamed that I would one day be working on tutorials or recipes that I would share on this blog. This Neapolitan Sugar Cookie was born in the summer of 2018 when I was beginning to explore combining different flavors within sugar cookies. This tutorial helps walk you through how to create these cookies with your favorite sugar cookie recipe.
Jump to:
Why You Will Love This Cookie
3 Amazing Flavors. Truly the absolute best part of this cookie is taking a bite and enjoying three amazing and delicious flavors. I recommend topping with chocolate candy melts, chocolate ganache or vanilla buttercream to really round out the Neapolitan flavor.
Wow The Crowd. This recipe can be some work, especially if you opt to use the 3 different flavors vs. food coloring. But putting in that extra effort is sure to wow any crowd you share these with.
Prep Tips
- Have Your Dough Ready. I have a vanilla sugar cookie recipe that you can use, but unfortunately the strawberry and chocolate recipes I used to have available on the website are back in the vault waiting patiently for updating. I recommend using Google to search for a strawberry or chocolate sugar cookie recipe - just make sure it is a roll out recipe.
- Roll Out Dough. You will be rolling the doughs together after cutting into thick stripes, so I recommend when prepping each dough to roll out to about ⅜" or ½" thickness. When you begin to assemble the dough stripes you will need to roll out again so this is when you can roll to desired thickness.
- Chill Time. Chilling the dough prior to cutting will help ensure a cleaner cut and not jagged edges. You only need to chill for 30 to 60 minutes.
- Equipment. There is not much that is needed for this tutorial, but the items listed are definitely needed. A rolling pin (preferably with measuring guides), an exacto knife (or a very sharp and precision cutting knife) and parchment paper are the 3 items you absolutely need to get this done.
- Time and Space. You will need both for this project. Time and space to prepare all the doughs, and then more time and space to put them together. Not accounting for the time to prepare the dough, I would estimate this tutorial is about a 2 hour project.
How To Create Neapolitan Sugar Cookies
This DIY process is to help you put together 3 flavors of cookie doughs to create a Neapolitan cookie.
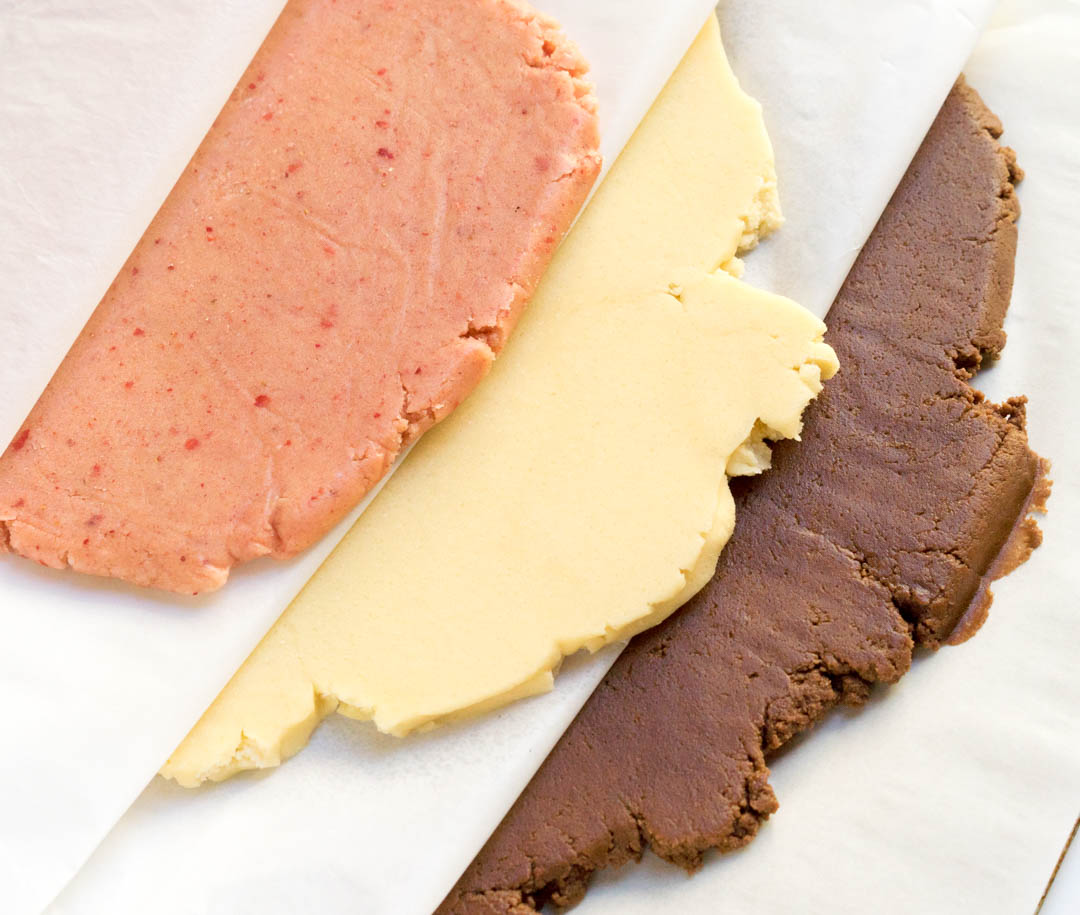
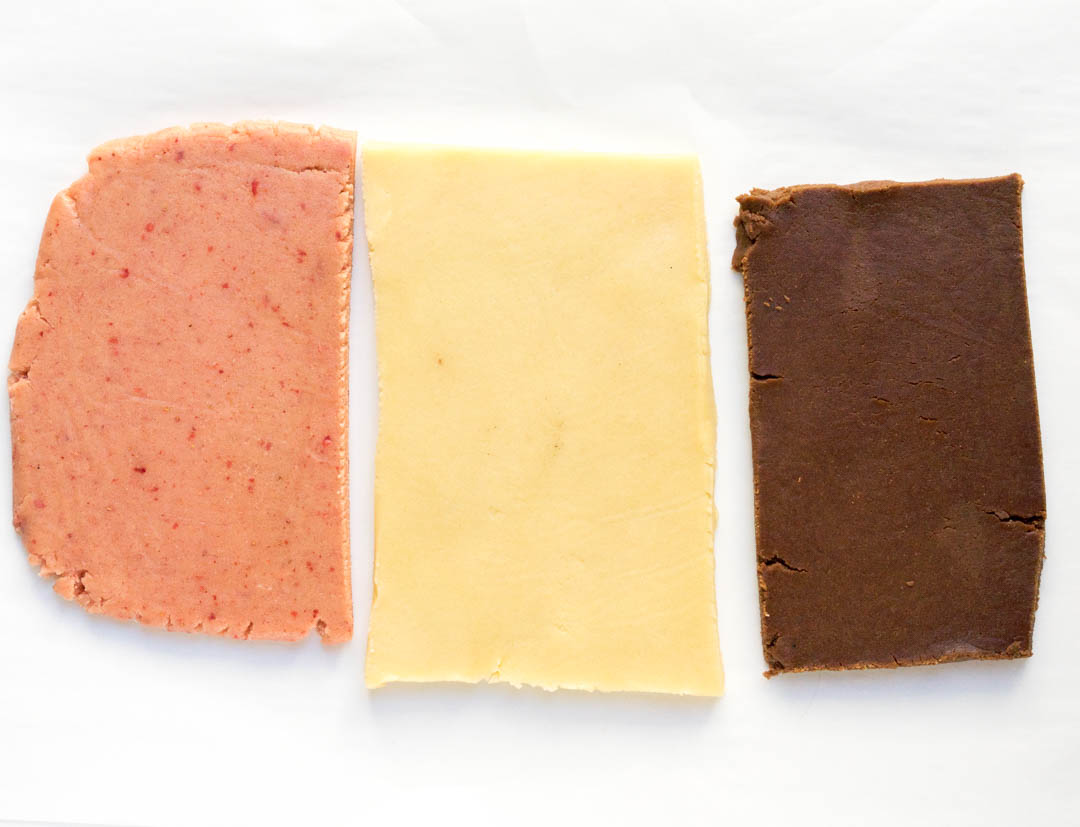
Step 1: Prepare all your cookie doughs. Roll out to a thicker thickness than what you would normally roll your dough out to (ie: if you generally roll to ¼" then roll these to ⅜").
Step 2: Chill dough for at least 30 to 60 minutes. Once chilled use the exacto knife to slice dough edges to create a rectangular shape. From here you will then do your best to slice into 1" stripes.
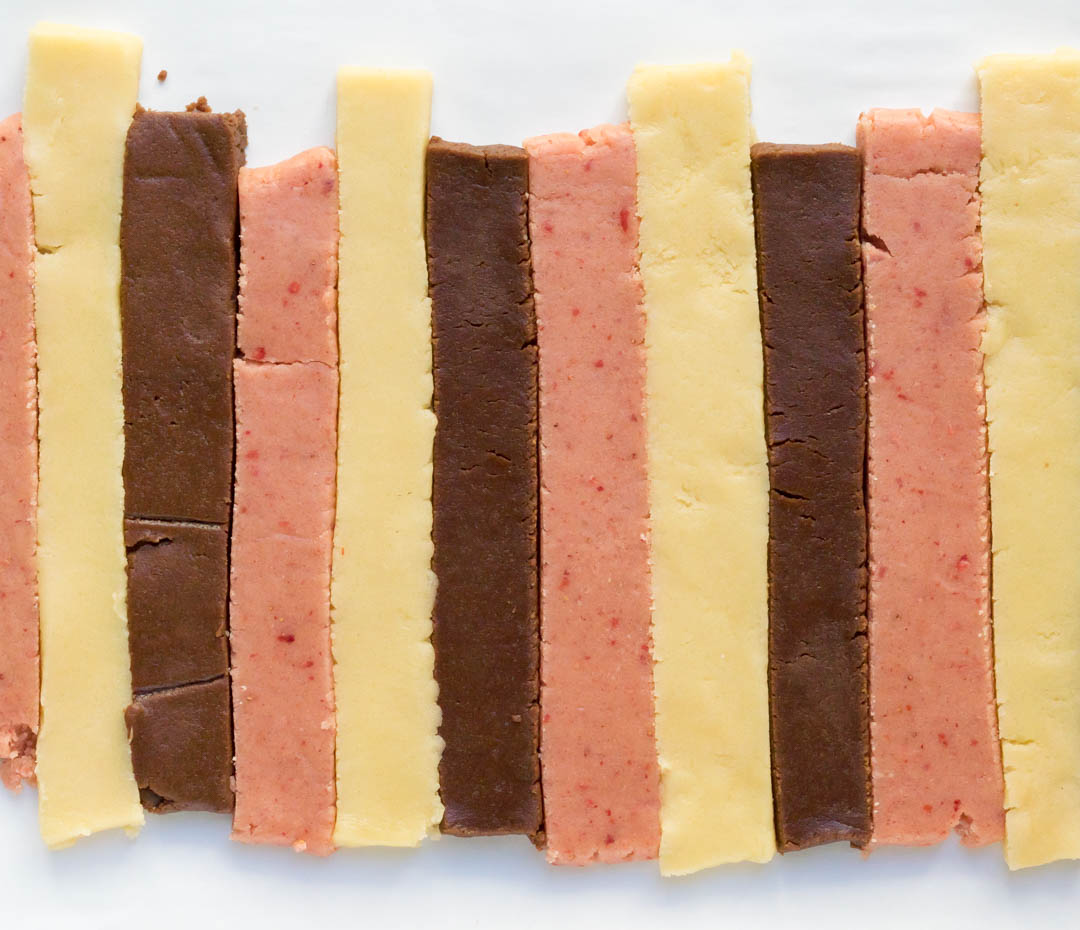
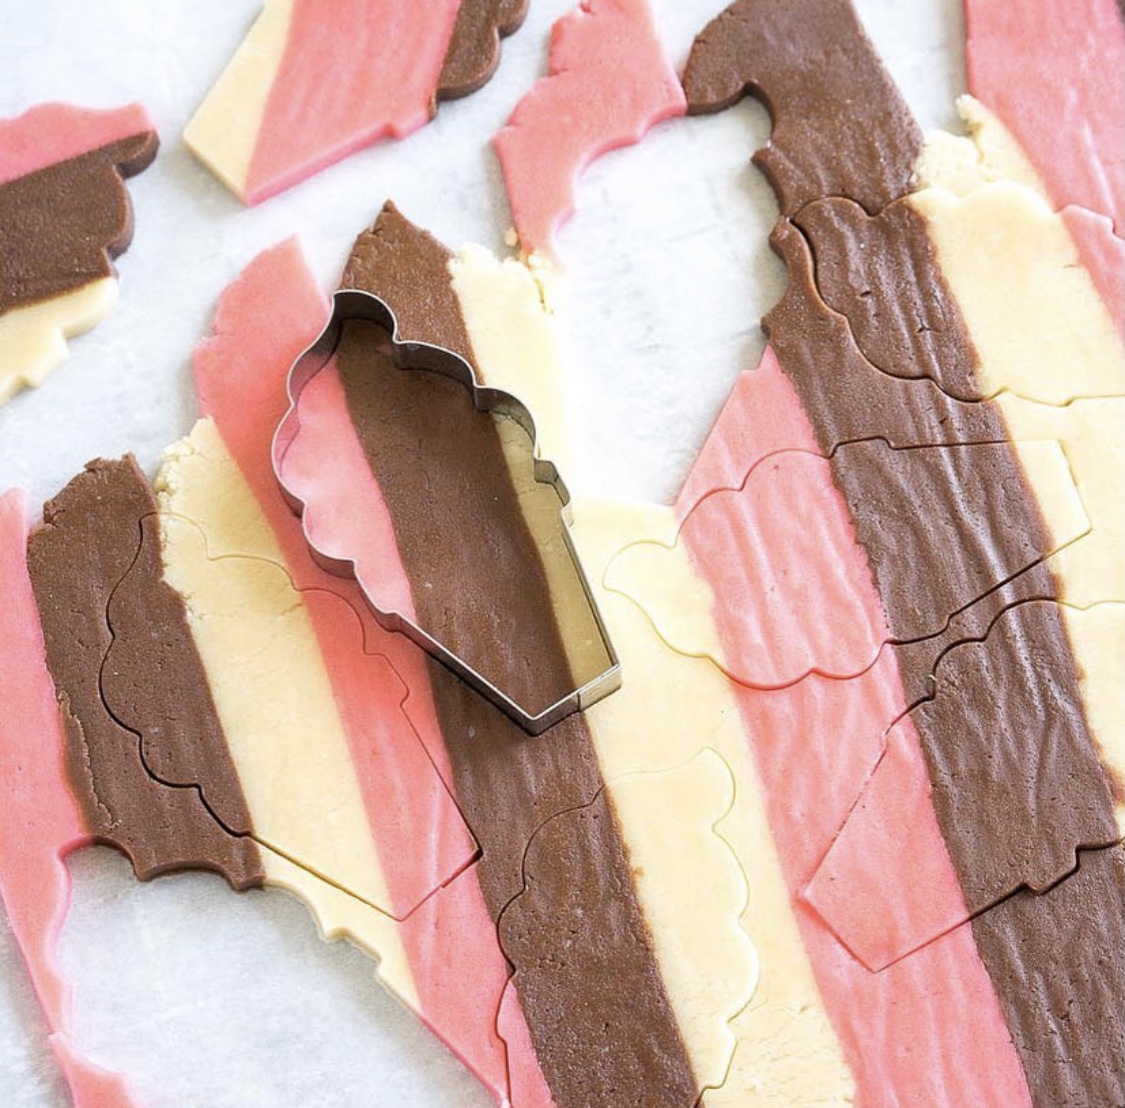
Step 3: On a separate piece of parchment line up the dough stripes by each flavor, repeating the flavor stripes as you go (ie: vanilla, strawberry, chocolate, repeat). Then place a piece of parchment on top and roll out to desired thickness.
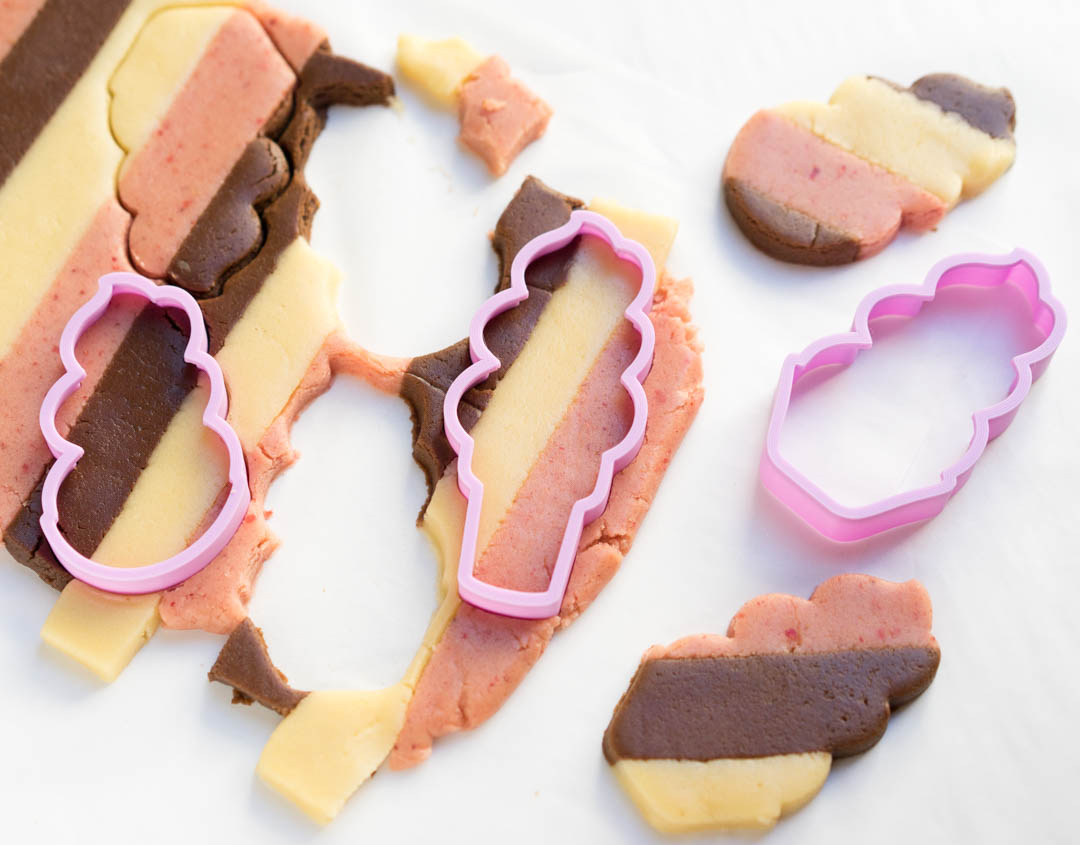
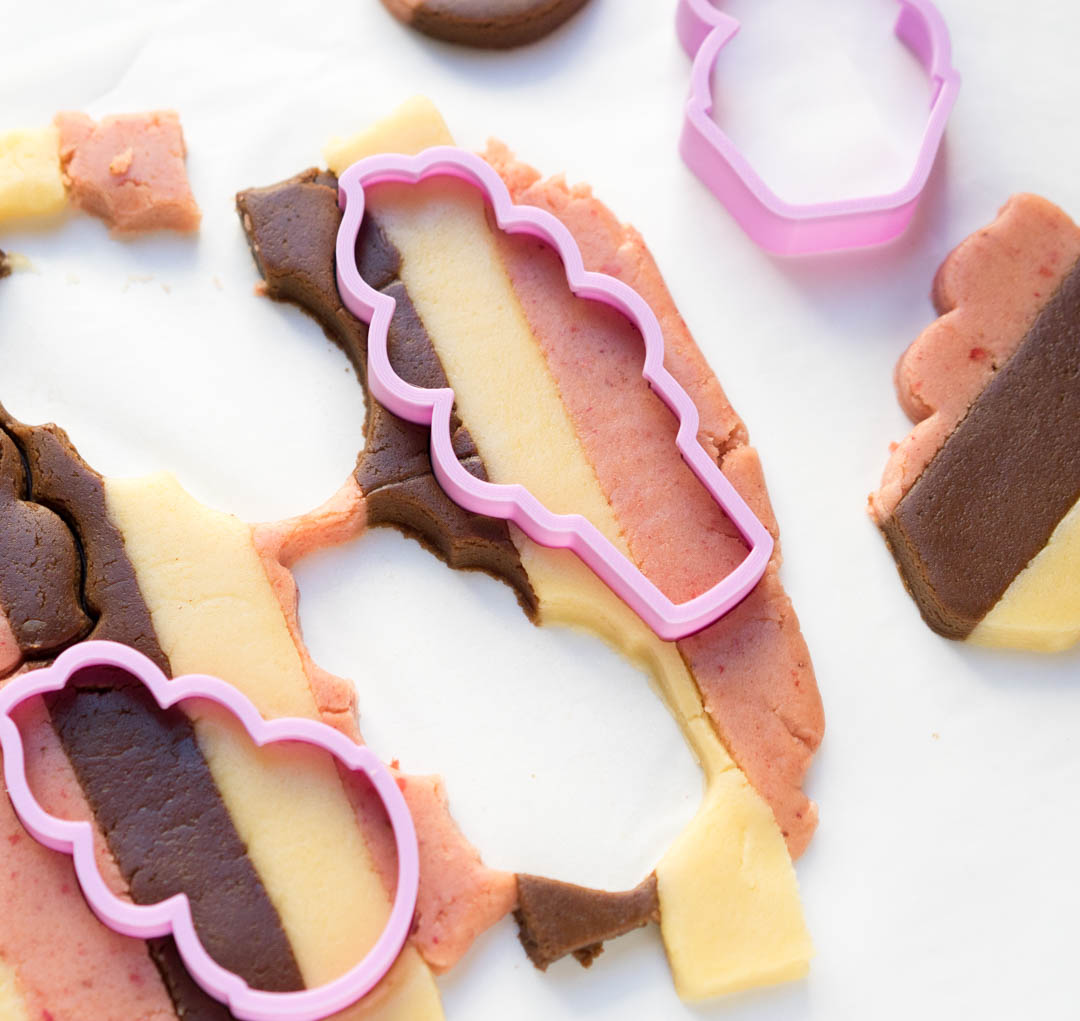
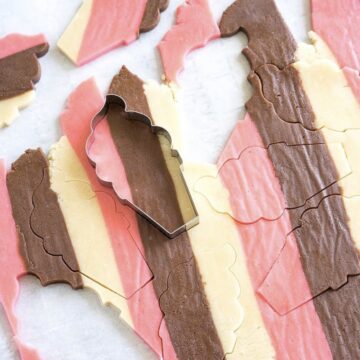
Step 4: Use cookie cutter to cut out desired shapes. Do your best to line up the cookie cutter and utilize all the available dough. Any leftover dough you can combine and roll out to create a marbled effect.
Step 5: Bake cookies per your recipes instructions. Allow to cool before decorating or enjoying.
Tips On Decorating
- Royal Icing. You can use a flood or still consistency to decorate however you wish. I recommend flavoring your royal icing with vanilla to help enhance the Neapolitan flavor.
- Buttercream. American or Swiss would go really well with this cookie.
- Candy Melts. You can choose any color candy melt to dip or drizzle onto the cookie for minimal effort but maximum flavor.
- Chocolate Ganache. A silky smooth chocolate ganache would also pair deliciously with this cookie. Drizzle or coat cookie as desired.
- Nutella. Drizzle on top of cookie for a nutty balance to the sweetness.
- Sprinkles. Add on as embellishments to whatever delish decorative topping you decided to go with.
Creating Neapolitan Sugar Cookies
Equipment
- cookie dough ready - vanilla, strawberry and chocolate
- parchment paper
- exacto knife
- Rolling Pin
Instructions
- Prepare all your cookie doughs. Roll out to a thicker thickness than what you would normally roll your dough out to (ie: if you generally roll to ¼" then roll these to ⅜").
- Chill dough for at least 30 to 60 minutes.
- Use the exacto knife to slice dough edges to create a rectangular shape. From here you will then do your best to slice into 1" stripes.
- On a separate piece of parchment line up the dough stripes by each flavor, repeating the flavor stripes as you go (ie: vanilla, strawberry, chocolate, repeat).
- Place a piece of parchment on top and roll out to desired thickness.
- Use cookie cutter to cut out desired shapes. Do your best to line up the cookie cutter and utilize all the available dough. Any leftover dough you can combine and roll out to create a marbled effect.
- Bake cookies per your recipes instructions. Allow to cool before decorating or enjoying.
Notes
- Have Your Dough Ready. I have a vanilla sugar cookie recipe that you can use, but unfortunately the strawberry and chocolate recipes I used to have available on the website are back in the vault waiting patiently for updating. I recommend using Google to search for a strawberry or chocolate sugar cookie recipe - just make sure it is a roll out recipe.
- Roll Out Dough. You will be rolling the doughs together after cutting into thick stripes, so I recommend when prepping each dough to roll out to about ⅜" or ½" thickness. When you begin to assemble the dough stripes you will need to roll out again so this is when you can roll to desired thickness.
- Chill Time. Chilling the dough prior to cutting will help ensure a cleaner cut and not jagged edges. You only need to chill for 30 to 60 minutes.
- Equipment. There is not much that is needed for this tutorial, but the items listed are definitely needed. A rolling pin (preferably with measuring guides), an exacto knife (or a very sharp and precision cutting knife) and parchment paper are the 3 items you absolutely need to get this done.

Leave a Reply